How does the basic equal distance or angle bisect mirror system work?
The mirror kicking handout and “VEPS GEMS – Part V: Banks and Kicks” (BD, May, 2010) describe and illustrated the basic equal-rail-distance mirror system, which is a visual application of the classic 2-to-1 system. The following videos, the 2nd from Vol. III of How to Aim Pool Shots (HAPS), show how the classic “mirror system” works:
For more information, see HAPS – Part VII: Kick Shots (Billiards Digest, May, 2015). Sometimes, people mirror and aim with the tip under the cushion. This works well for medium-speed shots at medium kicking distances under typical conditions, but it doesn’t work well for all types of kicks. Whether you mirror and aim relative to the rail groove (in from of the cushion), along the line of diamonds (behind the cushion), or under the cushion depends on shot speed and distance. It also depends on conditions. See the mirror kicking handout and the video above for more info and demonstrations.
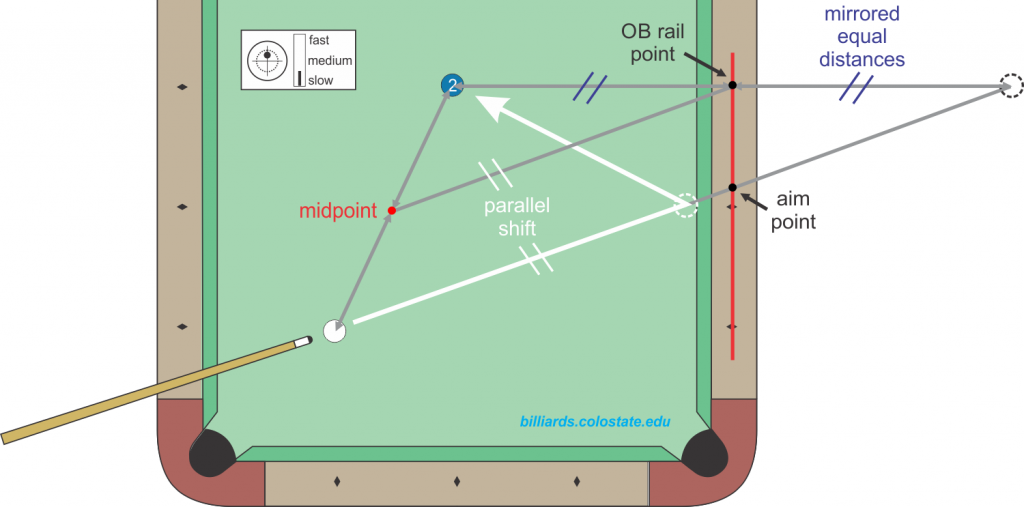
A related alternative to the mirror system is the midpoint-parallel-shift system illustrated below. You first visualize the midpoint between the CB and OB. Then you place your cue along a line from this midpoint to the OB rail point. Then you parallel-shift this line to the CB for the required line of aim, which is the exact same as the mirror-system line of aim. This system can also be applied to bank shots (see shot 484 on VEPS-IV).
The basic mirror (angle in equals angle out) systems provide a point of reference only. You must compensate your aim for a given shot based on the many effects and factors to consider.
For shallow angle kicks, where the object ball is close to the rail, the following mirror system works quite well:
Here’s another useful video, from Vol. III of the Billiard University (BU) Instructional video series:
For more information, see: “Billiard University (BU) – Part IX: Kicks,” (April, 2014).
When applying the equal-distance mirror system to banks (instead of kicks), the target is the pocket (instead of the OB), and you measure from the OB (instead of the CB). Everything else is the same, and you adjust for speed by measuring relative to the diamonds (slow), under the cushion (medium), or in the rail groove (fast).
from Patrick Johnson (in AZB post):
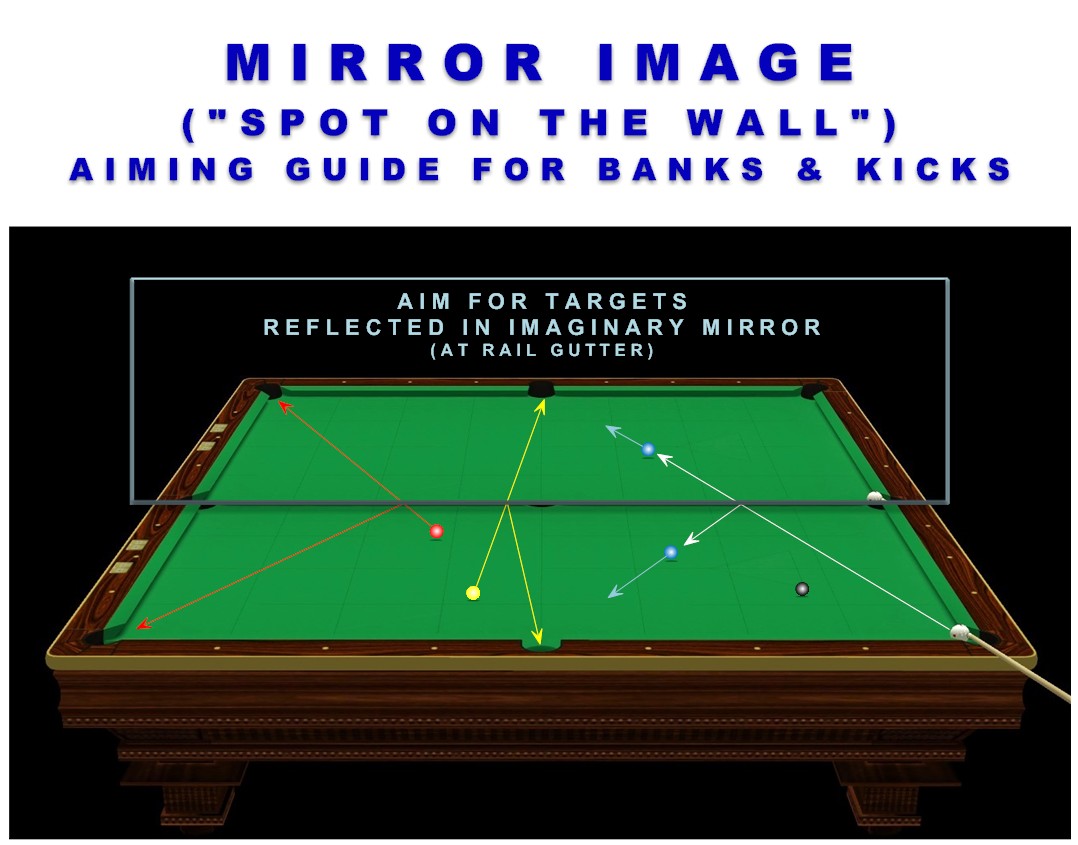
You might already know this trick for aiming “equal angle” banks/kicks:
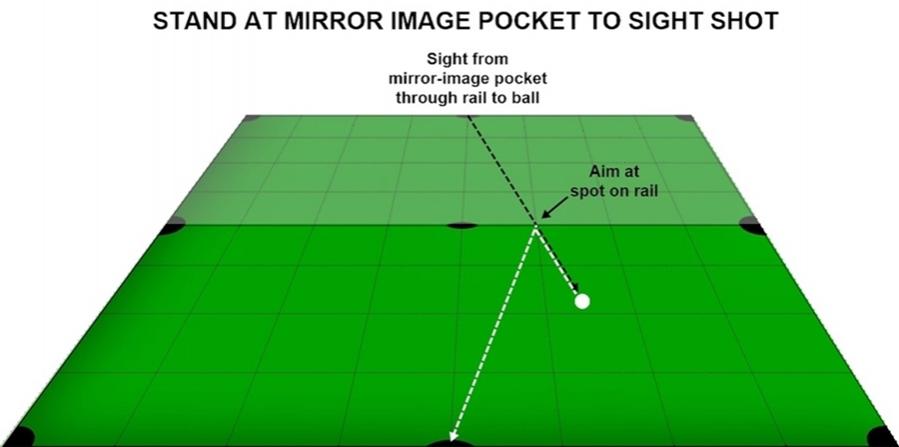
– Stand away from the table in the position where a mirror image of your target pocket would be.
– Sight from there back through the rail to the ball you want to bank/kick.
– Note the position on the rail that you’re line of sight passes through – that’s the equal angle rail target for your bank/kick.
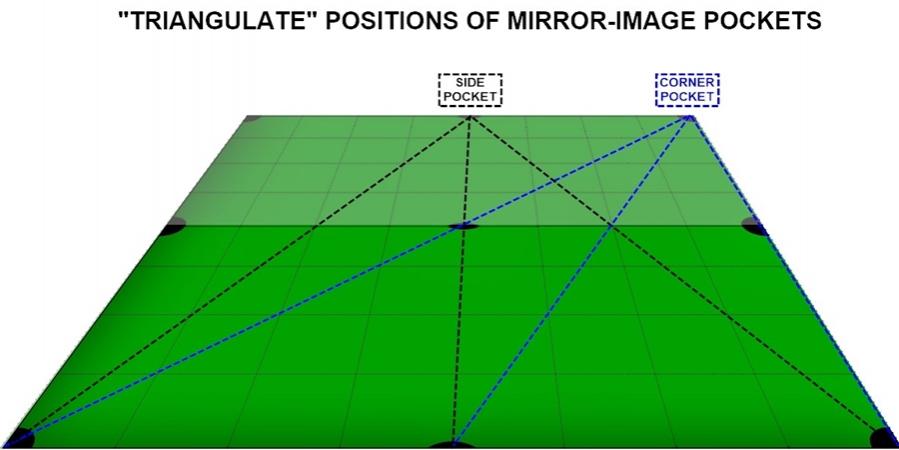
But even if you have the room to do it, how do you know exactly where to stand? You can use the pockets and diamonds on your table to visually “triangulate” the exact position of any mirror-image pocket.
Just stand where two triangulation lines cross – in the spot where you’re able to see straight along both lines – and you’ll be at the mirror-image pocket location.
The pic below shows how to triangulate pocket positions for long rail banks/kicks – the trick works the same way for short rail banks/kicks too, but I’ll leave that for you to work out.
from Patrick Johnson AZB post:
Here are the reference angles for banking/kicking to the bottom left corner pocket – they connect each 1/2 diamond on the far rail with the whole diamond twice as far along on the near rail:
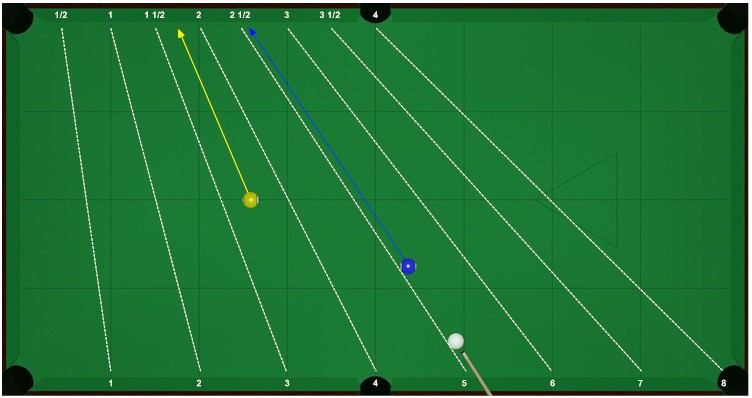
Of course, I don’t visualize all these reference angles for every shot to that corner. For instance, the 2 ball is very near one reference angle, so I’ll just compare it to that one:
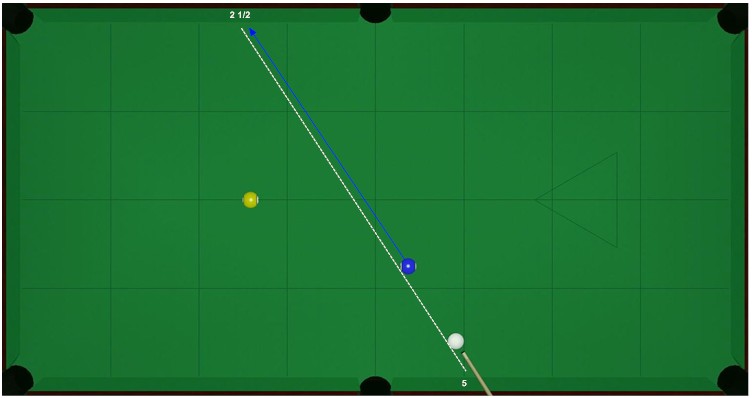
The 1 ball is midway between two reference angles, so I’ll compare it to both of them:
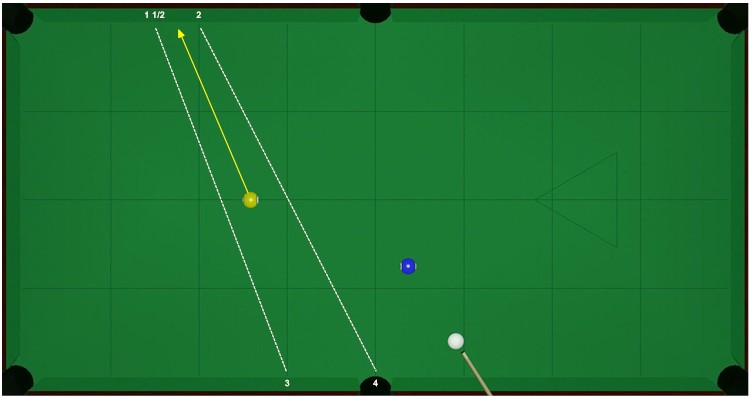
Here’s the same technique applied to kicking at a ball that’s not on the near rail. Just move the near “rail” (where you measure the whole diamonds) up to be parallel with the target – it doesn’t matter if the cue ball is above or below the adjusted “rail”.
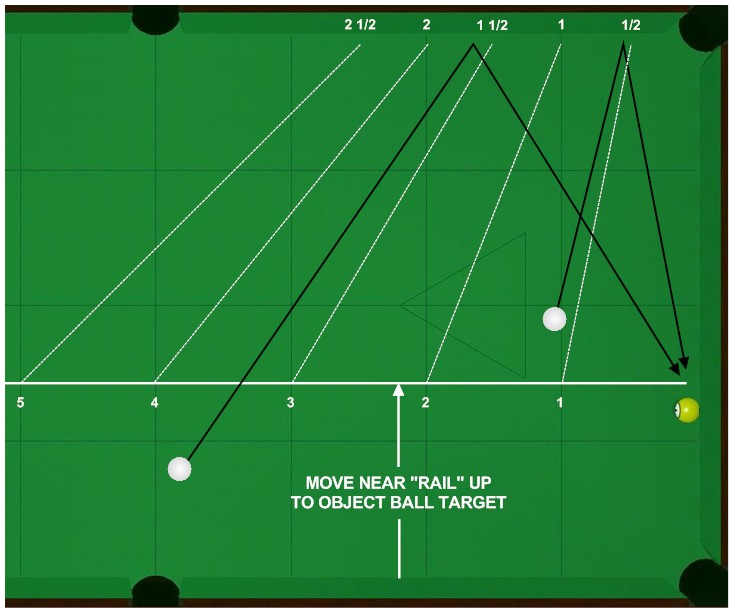
Here’s another way of measuring kick shots, a little different from the “reference angles” method I posted earlier, but using the same 2-to-1 principle. It should be self explanatory…
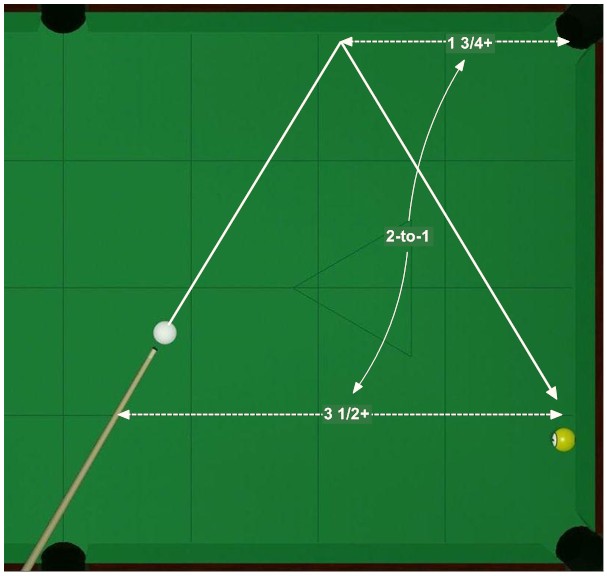
Like the “reference angles” this measures the “equal angle” kick, so of course you need to adjust for cloth stickiness & ball speed/spin.
from Patrick Johnson AZB post:
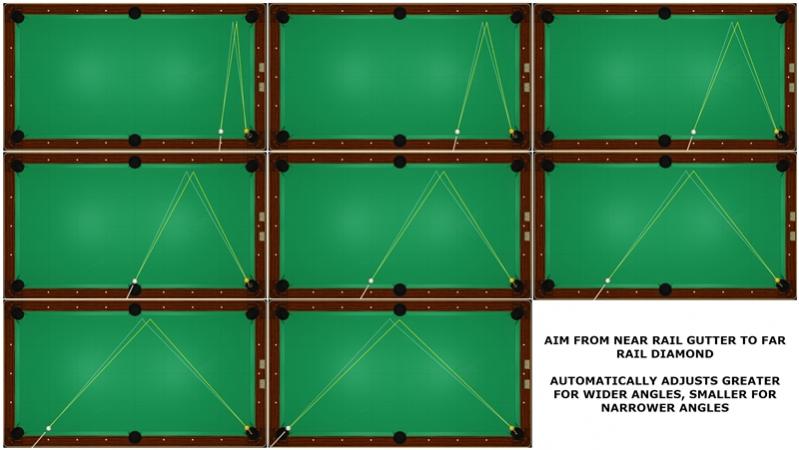
The most common adjustment you’ll make when using equal-angle reference tracks is to aim a little short to compensate for a rolling ball’s natural tendency to curve long as it rebounds from the rail. Fortunately, it’s also pretty easy – just aim at the diamond on the rail rather than the cushion nose (may differ slightly on different tables).
Here’s a pic illustrating those adjustments:
Dr. Dave keeps this site commercial free, with no ads. If you appreciate the free resources, please consider making a one-time or monthly donation to show your support: