What is a good approach for the 10-ball break?
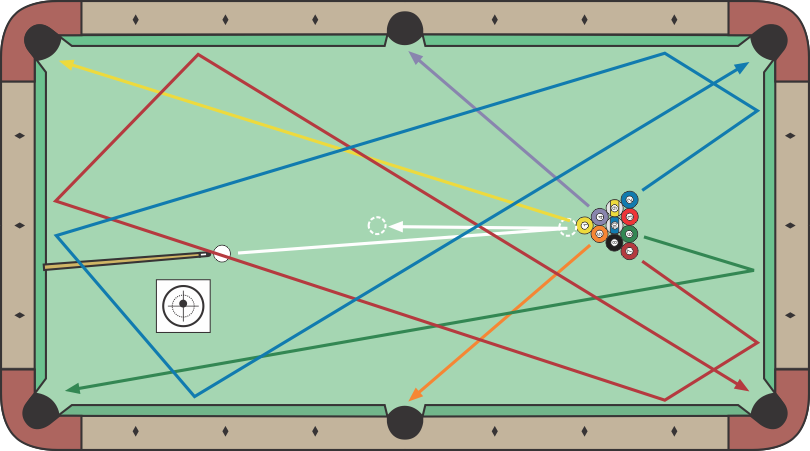
The approach in the illustration below works well if you can get a tight rack (see how to get a tight rack). The main goal is to pocket one or both of the 2nd-row balls in the side pockets. The CB is placed slightly off center to send the 2nd-row balls in slightly different directions to give the best chance to pocket one. This also sends the 1 ball toward the upper corner and the 6 to the other corner. Sometimes, the 1 can be pocketed; otherwise; you will usually get an easy shot after the break. The back corner balls tend to go 4 rails to the corners if the rack is good and nothing gets in the way. The technique and advice is the same as with the 8-ball power break.
For more information, see Vol. I of the Video Encyclopedia of Nine-ball and Ten-ball (VENT) which shows in detail how to control the directions balls head in a 10-ball break. See also: “How to Break Like a Pro” (feature article, BD, September, 2016).
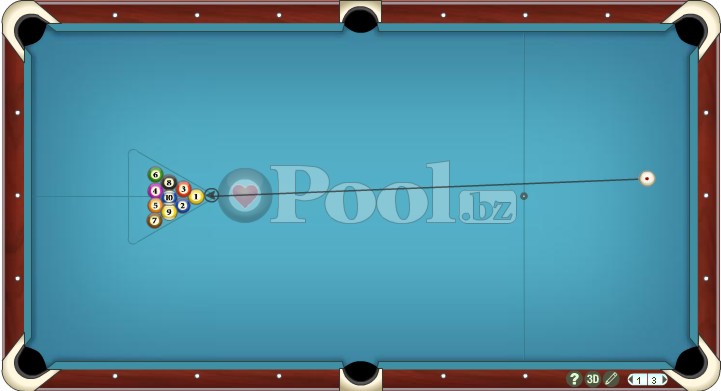
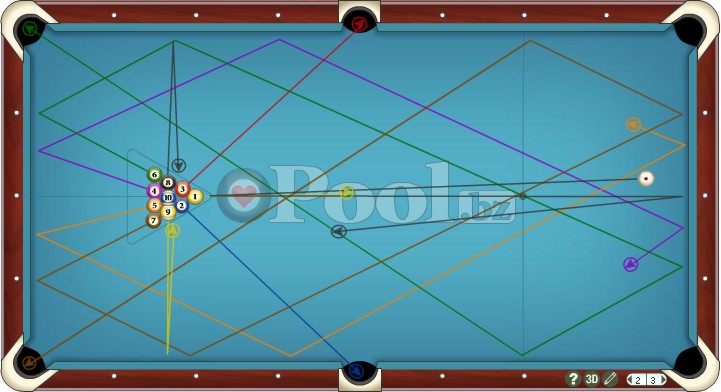
Here’s an example of a very symmetrical 10-ball break pocketing both 2nd-row balls in the sides:
Here are examples of great breaks by pros:
Here is another:
It is helpful to know racking and breaking strategy, but it is just as important to know how to get a tight rack.
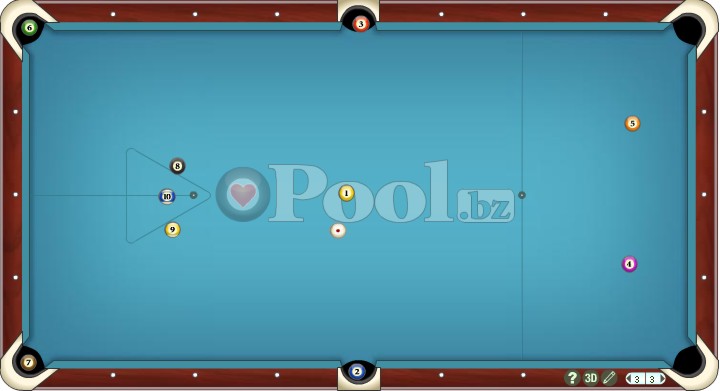
When the balls are not guaranteed to be racking tightly, a good alternative 10-ball break is a side break, with the goal of pocketing the 1 in the side, also with a chance to pocket a 2nd-row ball. Here’s an example:
Another alternative is a safety break, which is not recommended unless you don’t mind being “stared down” with disrespect:
Here are some statistics for effectiveness of pro 10-ball breaks. For technique advice, see the break technique and equipment advice resource page.
From spoons (concerning Corey’s break at Valley Forge in 2009):
The break:
He broke from slightly off center and seemed to be trying to hit the 1 ball as squarely as possible, with what appeared to be a hint of draw on the cue ball. The draw should help him make the 2 and 3 in the sides. It also brings the cue ball to the head rail out of the traffic, and back to the middle of the table for position on the 1. It was not a “soft” break like he uses in 9-ball. He was hitting them hard enough to send the 6 and 7 around the table 3 rails, but not much harder than that.
What he was playing:
He seemed to be clearly playing the 2 and 3 balls in their respective side pockets. Those are the two he made most often. But, as a secondary option, he seemed to be playing the 6 and 7 in their respective corners. By breaking from a few inches off of center, he should send those two balls around the table at slightly different speeds and give them a chance to miss kissing each other near the head rail.
The rest of the rack:
Racking the 4 and 5 where he did leaves those two balls together and uptable which would be the most natural place for the 2 and 3 balls to head if he doesn’t make them in the side, and racking the 8 and 9 where he did leaves a 3 ball cluster near the foot spot for him to finish the out. If the 6 and 7 don’t fall, they’re likely to end up down at the foot of the table which gives him a couple of balls to work off of to get position on the 8,9,10 cluster.
He rarely made more than a ball or two on the break, but if he ever made all four of the ones he was playing, it would be a throw in rack. Regardless, he left himself similar, and often simple racks to work with.
Dr. Dave keeps this site commercial free, with no ads. If you appreciate the free resources, please consider making a one-time or monthly donation to show your support: